The usability of open source operating systems (2025/11/24)
I often see newcomers to 9front asking about something along the lines of "Can I use this as a daily driver?", usually the implication being that if they had nothing but a 9front and a internet connection could they do all of what they tend to do on their day-to-day computing on some other OS. To which the reply is usually "well..." with the context that no we don't have a browser, no you can't play minecraft, and we only really have C (yes we have other languages here and there but C is the lingua franca).
People often add that you can indeed use more than one OS at a time, and indeed a large majority of 9front developers do as such. However I think it's important to point that at least for a decent chunk of people the notion of "is this a viable daily driver" is deeply tied to the grace of companies of making their (often for-profit) software running on your machine. Linus once mentioned that Chrome was a boon for desktop linux support because to a web site a Windows chrome instance and a Linux chrome instance are (or really should be) indistinguishable. But never forget this was only possible because Google thought it was worth their time to make Chrome work on Linux. This is not a new problem the whole "I can't run linux because I need my Adobe" was all over the place 15 years ago.
Non profit does get a bit better, there is of course a maintenance cost for supporting a different platform, and the more that system differs from the norm the more of a burden it becomes. The work for making web browsers continue to work on systems like the BSDs are largely held up by users and developers by that system. Things are better in that someone with the dedication and time can do the work for enabling their system and post the patch for inclusion, but it is still largely by the grace of the upstream project to accept it. You can of course maintain a fork but that only grows the maintenance.
At worst you have no avenue for making applications that users want work on your system, at best you can maybe roll up your sleeves and do what is needed, but the more you diverge the harder that work becomes and the more eyebrows you raise when posting the upstream patches. The BSD's likely only have support for various "mainstream" software because they're similar enough to Linux that things don't bit rot in to oblivion, projects like Haiku can get a lot of software running because they use gcc.
I'm sure for many a viewer I'm stating the obvious, none of this is exactly hidden. However as linux gets more "mainstream", I think its important to point out that the core problem here has not been fixed. In fact things have gotten worse I would argue. Without a solution, software has continued to grow more complex, more things to port, more functionality to emulate or implement. At this point writing a new system entirely from scratch and working up to supporting chrome is patently hilarious. Not to mention that the fact that ubiquity of chrome has lead to even more conceptually simple programs use it (or electron to be more precise) as their shortcut to cross platform.
How do we solve this? How do we get people to not make another god forsaken messaging app implemented in electron? I'd argue we need to stop allowing programmers to stand on the shoulders of giants, if you can't wrap your head around the black-box tech you use, you are not going to understand which parts of the interface are wrought with complexity under the hood. Complex pieces of code should naturally-select themselves out of existence the 50th time an engineer has a near panic attack working on trying to fix a bug in it. But we've gotten to clever, we've gotten really good at balancing the house of cards to keep things breaking just enough to not piss someone off that bad. The path to hell is paved with good intentions after all.
For operating systems, we've addressed the symptom not the cause. Linux got big enough for companies to start caring about targeting it, but the reliance on companies and allowing them to define what computing is did not go away. Just being "open source" is not enough, we need to support systems that can be implemented by one nerd in a weekend. If not, usability is going to continue to be defined by features outside of a developers control.
Complications of funding an open source operating system (2025/03/11)
I spend a decent chunk of my time working with 9front, and while it is far from being a house name the community is largely self sufficient and has lived on comfortably for over ten years. In the time that 9front has been around there have been plenty of open source projects created and reach funding in a state less mature than I feel 9front is now. I say that to not express some sort of frustration but it has lead to some discussions I had with some of the other maintainers over where we could go (if anywhere) from our current position. Part of this discussion was looking around at the success of other projects and evaluating our options, to which I've organized the possibilities in to rougly three catagories:
- Find a company interested in the project to bankroll projects/work
- Find a non-profit entity that sees an equally non-profit incentive for the software.
- Create a crowd funding system in which the developers are supported by a large userbase.
Corporate Sponsors
The first option is almost by definition excluded, the nature of 9front being its own operating system makes it quite difficult to onboard just parts of the system. You have to kind of go all-in or not at all. 9front is a self-contained system, you can't use it to run much of any existing software, and you can't run it on top of a lot of existing infrastructure solution. This makes using 9front for much of anything in a corporate world quite risky (from a business perspective). A case could perhaps be made for the purpose of "embedded" systems but considering the expectation these days is that your SoC comes with (at the least out of tree) linux support, and our general shortage of funds for buying a large range of systems to debug we're a bit stuck there. I think a large amount of the community would have ethical concerns, or at the very least, questions about a contrast in ethics between some corp and themselves. This can also have large impacts on the social portions of your project where developers with some sort of corporate backing are given some sort of fast track, or invited in to discussions that only happen behind closed doors. (see my last post about the Linux kernel for more about that). Overall it's perhaps the least appealing option our of the three.
Non-profits.
While non-profits are not as hopeless, there really is not a large selection to choose from. Non-profits are naturally looking for impact, a self-contained system is not particuarly interesting from that perspective. Perhaps most impactful from our perspective though, is that to many folks cutting checks, the question of a decently ethical operating system has been long since fufilled by Linux. While I may have disagreements about a lot the implementation details and the organization of the linux development community I tend to agree that for many people there are simply larger fish to fry. There are still many parts of an assumed software stack that feature software with not many (or lack luster) alternatives and perhaps focus would be best spent there. In short, the pool of money is small and linux is "good enough".
Sidenote: Yes the term non-profit has become muddled, as many of them serve the ego of one individual at best and the thinly veiled corporate interests of some mega corp at worst. One must be just as vigilant in following the trail of money with a non-profit (and perhaps even more?) compared to just getting a check from a for-profit company.
Crowd Funding
That leaves us with the latest trend in funding, the crowd source model, generally made possible now due to the popularization of such methods for other artists (Patreon and the like). There have been plenty of projects who have seen a large amount of success with such a model (both serenityOS during its hay day, and Zig come to mind). However the biggest issue with this is that it relies on popularity. If you want to break out into doing this it incentivizes behavior that I feel may compromise a project in the long run. Some examples:
- Popularity leads to a large userbase
How many times have we seen projects explode in popularity only to crumble under their own weight in terms of moderation, bug report triage, and governance? If you start to run before you walk (which this model does incentivize), you wind up with a perfect recipe for burnout. What was 5 hour a week relaxtion project has now turned in to a organizational mess with people wanting your answer to their questions yesterday. This is not insurmountable, it just requires a lot of attention and planning.
- Popularity requires accessibility
This is not a bad goal in of itself, accessibility of any kind is a noble goal. However certain technologies (like operating systems) are much harder to make accessible than others. Spinning up a VM can be involved and presenting an entire new environment, instead of using an existing one that people are familiar and comfortable with, can prove to be too much friction. Nerds (of all kinds) get very accustomed to their customizations and decisions on their setup, when you tell someone they have to leave a lot of that at the door (as an operating system might do with things like shells, editors, and so on) you make things much less accessible.
- People can expect some sort of "kick-back" for their money.
This is something that I (thankfully) have not seen as much of within the existing crowd funded open source projects. However it is something that is tempting to those looking for ways of increasingly turning users in to donators. Anything from private donator only communication channels to prioritized bug reports can create some perverse incentives. Software support and community are integral parts of the open source experience, you don't want to lock that behind a paywall.
To evaluate this from 9front's perspective: We certainly don't have the means currently to support a large spike in users, and the discussions needed to create something more structured and organized in order to do so are not particularly looked upon fondly by our current contributors. 9front's self-contained nature (we have our own text editors, shell and so on) and by virtue of being an operating system can make accessibility quite difficult, some progress has been made on this front but there is still a long way to go. Kick backs for donations I think would make many of our group feel uncomfortable, many of us work in 9front to escape the unfortunate realities of "real" work like money-based prioritization.
My conclusion when I first explored this (and now) is that as things are with the open source community at large, there is really not an a clear path forward. Any of these options are going to require a large investment of non technical time and some amount of compromise on incentives of the project in pursuit of securing and maintaing funding. This is not surprising, there is no free lunch here, but it is unfortunate that this is the situation we find ourselves in. I think 9front will continue on just fine, on its own terms and on its own time.
Human Scale Software vs Open Source (2024/07/31)
Recently I've taken a liking to using the phrase "Human Scale Software" when describing code that I feel is easy to work with. I use this to describe software that I feel could fit comfortably within the brain of a single person, and not in the "memorize every detail" sense but more in the "understand the narrative deeply" sense. I find this is an important distinction from software that is just open source, because I often find myself interested in digging in to code only to find it completely inscrutable.
I consider the relation between the terms as a sort of sliding scale of enjoyability to hack on. Proprietary software by nature makes it quite difficult to work on, often requiring a specific skill set of reverse engineering, assembly, and an iron will to bend the software to your needs. With human scale software being the opposite, often quite pleasant and easy to make your own modifications to. This leaves open source software to cover the large and ambiguous middle gray area between the two. I think this is important to highlight because as a software engineer that entered the open source world with large ubiquitous projects already running the show, I felt like there was a disconnect between the "hacker mythos" as it was told compared to my actual experience with these projects.
One of the worst offenders of these open source but not human scale projects I think is the Linux kernel. There are some factors that are easier to pick on here, Linux is perhaps the most successful open source projects, has a huge community of people working on and using the system, and in general has grown quite complex over the years. However I think in general the corporatization of the project over time is what really makes the system feel like this indigestible behemoth. To illustrate my point, I want to show some excerpts from the Linux documentation that is checked in to the main git repo under the Documentation directory.
Documentation/process/1.Intro.rst:
The importance of getting code into the mainline
Some companies and developers occasionally wonder why they should bother learning how to work with the kernel community and get their code into the mainline kernel (the "mainline" being the kernel maintained by Linus Torvalds and used as a base by Linux distributors). In the short term, contributing code can look like an avoidable expense; it seems easier to just keep the code separate and support users directly. The truth of the matter is that keeping code separate ("out of tree") is a false economy.
Documentation/process/2.Process.rst
Questions about how to get started with the kernel development process are common - from both individuals and companies. Equally common are missteps which make the beginning of the relationship harder than it has to be.
Companies often look to hire well-known developers to get a development group started. This can, in fact, be an effective technique. But it also tends to be expensive and does not do much to grow the pool of experienced kernel developers. It is possible to bring in-house developers up to speed on Linux kernel development, given the investment of a bit of time. Taking this time can endow an employer with a group of developers who understand the kernel and the company both, and who can help to train others as well. Over the medium term, this is often the more profitable approach.
Individual developers are often, understandably, at a loss for a place to start. Beginning with a large project can be intimidating; one often wants to test the waters with something smaller first. This is the point where some developers jump into the creation of patches fixing spelling errors or minor coding style issues. Unfortunately, such patches create a level of noise which is distracting for the development community as a whole, so, increasingly, they are looked down upon. New developers wishing to introduce themselves to the community will not get the sort of reception they wish for by these means.
Now I will preface this with saying I did cherry pick these somewhat, these are sandwiched between some quite detail heavy instructions about how the community works. However, I can't be alone in thinking some of this reads more like an advertisement you'd see on some startup SaaS landing page than I would an open source project. They go insofar as to directly imply that having your company contribute to the kernel will result in better profits. The second example I find particularly discouraging, what starts off as an endorsement to training internal developers to contribute ends with a condemnation telling your average Joe what NOT to do. Even now, as someone who has done a non trivial amount of kernel programming with Plan 9, this makes me feel like I'm in the wrong group. I've shown up in some sweats and a t-shirt to a cocktail party full of suits and greased up hair.
I don't think the Linux kernel was always like this, at the start I do really think it was a bunch of hackers. The underdog up against the bully in Redmond, David vs Goliath, and what not. In those early days hardware support was (as I understand it) fueled by a lot of hard work and some reverse engineering. This was required because hardware vendors often keep required implementation details close to their chest at best, and entirely locked behind vendor contracts at worst. These days a lot more companies (Qualcom, AMD, Nvidia, and so on) are more directly involved with the mainline code for their hardware, however the situation around proper documentation has not gotten any better. The problem here is that the root of the problem was never truly addressed. Instead of companies changing and providing a complete set of documentation for their hardware, they've just changed to writing code directly for the Linux kernel. This leaves more obscure operating systems, BSDs for example, still entirely in the dark. In a perfect world, the Linux kernel could maybe exert their power as "thing vendors want code in" as a means to force companies to be more open. In reality however, if Linux makes it hard to contribute then companies will just fork and jam their own code, which is unfortunately still the case even with the current rules. It just seems unfortunate that Linux decide to join the ranks of privileged projects blessed by hardware companies, after knowing first hand the frustrations of being caught out in the rain.
These are some of the unique issues I see with how the Linux kernel has evolved over time that I think fly in the face of ethos of open source. This is the reason why I think smaller scale operating systems like OpenBSD are so important to the ecosystem at large, you can get a good understanding of how friendly/feasible it is to write support for hardware. The lesson I want to impart here is that just because source is available it doesn't mean that a mere mortal can work on it.
Plan 9 is a Uniquely Complete Operating System (2024/07/27)
A large contributor to the "feel" of an Operating System comes from the software it chooses to include by default. There are entire linux distributions that differentiate themselves just based on the default configured software. There is room for so many options of base software because there are in general many different options to pick. Linux being just a kernel itself specifically creates an environment which encourages this (to some extent). This is both a blessing and a curse, for people wanting to write software targeting linux there now is some matrix of options they must test under if they want it to work with all the various software choices. BSD systems, unlike Linux, tend to include more than just a kernel by default, generally including some "blessed" c library, c compiler, libraries and programs. This makes targeting the system a bit easier, in the sense that you can assume there is a larger set of software on a BSD machine than you could with some system that uses a Linux kernel. Even with BSD however, not all of the software is in control of those in charge of the system itself, there is still a large amount of shared code between these systems for things like the c compiler. There are some pros and cons to this situation. On the plus side these systems get to reap the benefits of the work put in to these other projects (gnu, llvm, and so on), but this also does lead to there being some differences in design. Put in another way, if someone wanted the ability to touch every line of code (in the upstream sense), they would have to be a member of some non trivial amount of communities.
Plan 9 is unique in this sense that everything the system needs is covered by the base install. This includes the compilers, graphical environment, window manager, text editors, ssh client, torrent client, web server, and the list goes on. Nearly everything a user can do with the system is available right from the get go. I think this is super important for a couple of reasons:
- Everything is one monorepo, a single commit hash communicates your entire kernel and user space state.
- There is a consistency of design between all the code in the system.
- There is no matrix of configurations to test your software against.
- Programs can assume the presence of a fairly large collection of software.
- There is an encouragement to write new software that adapts to the Plan 9 style instead of importing existing software.
There are of course some downsides to this approach as well:
- The Plan 9 implementations tend to not be as feature rich as the proper upstream variants.
- There is a larger barrier to entry when adding new programs or features to the system.
- In general the system becomes somewhat isolated from the general flow of software outside of it.
I generally like to think the pros outweight the cons, but I do acknowledge this design is part of the reason why Plan 9 has generally been stuck as just a hobbyist curiosity.
It is important to highlight this difference because I think in general people are not aware of the amount of independent implementations that have been written for 9front as part of following this design. There is no other system that provides this many examples of its own interfaces, that are by themselves generally useful programs.
Some examples I'm fond of:
Specifically because of this design, Plan 9 becomes an excellent learning resource for anything that it supports. It becomes a sandbox for individuals to learn and experiment with any topic of operating systems. In these regards I do think that Plan 9 is a truly unique collection of software.
If by some chance this writing interested you in the Plan 9, I encourage you to download the 9front iso and give it a go. As of the time of this writing the amd64 release iso is a measily 467M and includes everything I've talked about.
Not Not Porting 9front to Power64 (2024/04/03)
In my last blog I documented some admittedly frustrating interactions with getting this Raptor Computing Talos 2 up and running again. It ended with me not certain about if I was going to get this running again or if I was going to wind up with a very expensive paper weight. So it is with great excitement that I say that indeed the talos is working again.
The rest of the story is that with a couple more weeks of patience and back and forth I was able to have Raptor identify some components that were damanged on the board, have them identify the values for said components, and had a very good friend of mine attempt the repair. Happy to say everything went as planned and the Talos is currently sitting beside me runing Debian stable.

So compared to my previous blog I do owe some apology, Raptor did end up helping me get things fixed and I'm grateful that we were able to get here. However, I do still stand by my evaluation that the customer support is a bit... less than ideal. Talking to some other members of the talos IRC seems to confirm that this is a somewhat common occurance unfortunately, and I think this is worth mentioning to those who are interested in getting one of these machines. But enough grumbling, let's get to the fun stuff.
Start of the port
Now with a working device I had no excuse to start the porting process. I rebased my old branch on top of current 9front and set to work again. Where I had left things was a userspace (compiler, linker, assembler, libc) that was capable of building the entire system and a proof of concept for running a binary from skiboot. However to move forward I had mostly decided that we should build a kernel that is compatible with petitboot(linux kexec) in order to have others be able to boot the machine from their existing firmware.
So first up was figuring out how kexec worked, no documentation of course so straight into the code it is. What we found was that powerpc64 kexec drops you in to a random spot in physical memory, passes you your current location in a register and says "good luck". This is slightly annoying because in 9front we don't generate relocatable binaries, we pick one spot for things to be in memory and go with it, which meant that we had to do relocation here. Not too bad, a couple of assembly loops later and we had our kernel in a spot in physical memory where it expected itself to be, not too bad. There were a couple quirks along the way with this, like how kexec only uses the first segment of the ELF file, or how linux kexec limits where the sections of the ELF request itself to be put, even if none of that is honored by the kexec userspace utility, but whatever it works.
Most of our console is going to be done through the bmc console, which means we use OPAL calls in order to print and read. Not too big of a deal a couple of assembly shims and now we're printing this to the console. There is some of a mismatch between the ABI to OPAL and our own internal ABI between functions that makes writing the assembly shims a bit dangerous, but we got them working. At this point I was back to where I was before with my little POC before with skiboot.
Next up was getting us over in to C, which was pretty easy just have to be slightly careful around how to set the static base (TOC in ppc terminology) because we still don't have the MMU up, but nothing too difficult. What we did find however was that our linker and compiler were choking on 64 bit constants, so I had to spend a day or so modifying those to generate acceptable (for the time being anyway) instruction synthesis for 64 bit constant operations. This took a little whiles and lots of staring at the ISA to see if there was a better way to do things. For a worst case 64 bit immedaite, a load is 5 instructions (ouch!) but you can get away with less instructions for portions of that 64 bit number that are zerod. So what the linker does now and try to fit a constant within one of those cheaper paths, then falling back to the expensive path. A better solution may be to have the compiler generate a constant pool and do 64 bit loads here instead of using immediates however with how we bootstrap our statis base, we'll need to use that worst case at least once before we can use SB to address data in the DATA segment. The arm64 compiler on 9front does things a bit different and instead just generates constants into the instruction stream itself, and uses PC relative 64 bit loads. This would also work for boostrappnig the SB, but is a bit more complex to implement. Lots to think about...
With that mostly out of the way (at least for now), we need to focus on bringing up the MMU. Which for the time being is lots of time reading the ISA manual and checking against what other systems do. Interestingly POWER9 has two different methods of configuring the MMU, there is a more classical "Hashed Page Table" design and a newer radix tree implementation. The radix tree is a bit more typical to other systems, but only works on POWER9 and up and I am curious to try the "true powerpc way" with the hashed page tables. I haven't attempted to write the code for bringup yet but hope to get to that soon, still need to read over that section of the ISA a couple more times though to get a proper understanding.
That's all for now, maybe I'll write another blog post once I get further along.
Not Porting 9front to POWER64 (2024/02/26)
A couple months ago while on a break between jobs I had taken some interest in exploring a new arch to port 9front to. 9front already runs on a fair share of architectures and 9legacy has a working risc-v port so I wound up turning my attention to POWER64. In doing so I was drawn inevitably to Raptor Computing, as the only maker of reasonably priced hobbyist grade systems. Now there hasn't been a new Raptor Computing machine in a little bit and since the pandemic the prices of their existing systems (Blackbird and Talos II) have gone up to almost double of what they were originally. Before I pulled the trigger on an expensive(4k USD) toy I wanted to get a good start enough to convince myself that I was going to really get it done.
I started by taking the existing POWER64 toolkit from 9legacy and imported that in to 9front. This gave me a compiler, linker and assembler which mostly worked and after a bit of patching they were capable of at least compiling the entire source tree. So far so good. Next up I got the POWER9 QEMU binary up and running and set out to get some code generated on 9front actually running on the machine. I first needed to decide exactly which entry in the boot chain I wanted to put 9front at as these POWER9 systems have an interesting bootchain. It looks something like:
Hostboot -> Skiboot -> Petiboot -> Linux Kernel
Now for QEMU hostboot is kind of "baked in", not something that is easy to change. Skiboot is there mainly to provide OPAL (OpenPower Abstraction Layer) to the next piece in the chain. OPAL itself is somewhat similar to a BIOS in a PC, in that it sits somewhere in physical memory and has routines that do some abstracted operations that would otherwise be machine specific. In this case it also passes us a device tree detailing the peripherals. Now typically skiboot is used to load Petiboot, which has the ability to do a full linux kexec boot. Somewhat influenced by this blog I had decided that I should aim to have skiboot boot my binary and go from there. In part since getting linux to kexec a 9front kernel is not something that works and fixing it sounded like a bit of a waste of time. So I spent a lot of time reading about OPAL and getting our assembler and linker to a point that it was generating something skiboot would actually run. This took slightly longer then expected but the end result did work.
At this point I was pretty bought in, I was having a fun time reading the ISA and learning about the boot process. I had a mostly working userspace and had some actual POWER64 code running under a virtual machine. Those Raptor Computing machines were looking quite tempting now. I had also learned then that OpenBSD did indeed run on the Talos II but not within the QEMU POWER9 environment. What I really wanted was this code running on hardware so I figured I should see if I could try getting some hardware under the assumption that I should be testing on what I want to be running on.
I had first attempted to reach out via the OpenPower Foundation. On their website you can contact them to request access to resources for open source work. I submitted the form and requested access to some Raptor Computing systems hardware to continue this work on. Roughly a month later I hear back from another organization within Open Power who offered to assist me with access to their virtual lab. They had mentioned they had attempted to reach out to Raptor on my behalf but had heard nothing back, but instead they could offer access to their IBM systems in their labs. I thought this was great! But there was some issues. They had access to some proper IBM big iron POWER boxes, the kind that would go for more then a house in the midwest, and figuring out a method to do OS development on these machines remotely turned out to be a bit troublesome. Short of throwing a kernel directly on the machine and hogging a whole one to myself, there wasn't really much that could be done. Everything else would be virtual, and while the prospect of running 9front on a IBM big iron was neat it didn't seem practical. Not to mention my fear of some dumb code running on bare metal harmering this very very expensive hardware. So my thought was "well I can keep going with QEMU for now, if I get it working there I can test it running with hardware accelerated virtualization here to make sure that also works" and set my sights back on to poking at QEMU.
A bit later a netizen of SDF mentions they have their hand on a Talos II, and would be willing to sell to me for a reasonable price. The problem was that the machine did not fully IPL, there was something going on with it. The original owner thought perhaps it just needed its firmware reflashed or something but didn't quite have the time themselves to tinker with it. So we agreed to ship it over to me, see if I can get it working, and then deal with the money later. The machine arrived and I see the same error and set to work on diagnosing it. I spent a lot of time on the raptor wiki, I asked around in the IRC, I tried all the upgrading, downgrading, sidegrading, compiling from source, all of it to see if I could get lucky and have this just be a software issue. After a week worth of evenings messing around with it, I came to the conclusion that there indeed was some hardware issue with the board.
I was a bit out of my element now. The error specifically was an i2c timeout. Through enough debug prints in the boot loader we found that this was specifically related to the dram. So I bundled everything up, asked a couple more times on IRC and submitted a support ticket to Raptor. I figured that it might be possible to pay to send the board back to Raptor to have it properly diagnosed and fixed. I submitted this ticket in Oct 2023, with all the information I had gained and decided to take a break from POWER for the time being.
Fast forward to February 2024 and I had still not heard back. I was itching to get going again and make use of this machine I had sitting in my apartment. I had recalled that someone mentioned in IRC that the only reliable way to get in contact with Raptor was through twitter. I don't have an account there so I had a friend of mine @ them and ask about the ticket status. Some 3 days later I got a response to my ticket. They confirmed that issue was likely a hardware issue, and that it is something that they are familiar with. They said it was likely some pads or caps on the underside of the mother board had been damaged between the main chip and the DRAM. Repairability they said would depend on if the pads were still intact.
I responded an hour later with pictures of the entire motherboard and reviewed the board myself. They had not supplied a reference photo and it seemed that there was not one available online, so it was hard for me to tell if there was an issue. That was a bit ago now and I still have yet to hear back. Their response did not have any details on if it were possible to send it in for repairs to them, I assume that is not something they are interested in.
Now I know I wasn't the original buyer of this box and its out of warranty and they're likely a small shop of engineers, but something about the whole experience with Raptor just didn't feel right to me. If my only options were to attempt repairs myself and/or buy a new motherboard for something that is a known issue I would honestly rather spend my money elsewhere.
In my initial support ticket I had talked a bit about my intention to do this port work. I thought that folks who cared a lot about open-ness would think the port work is cool. Something like "Look at how usable our devices are because you can just read and fork the code" kinda deal. The folks behind the MNT reform was very happy to learn that Cinap had ported 9front to their machine. But that just didn't seem to be the case here. It seemed like Raptor was very removed from the overall POWER community. They didn't have any employees in the IRC, they ghosted the other folks from OpenPower, and it took months and twitter pestering to get them to reply to a support ticket.
There are great members of the community that I met in my journey to figuring all this stuff out, and those folks were awesome. I still learned a lot and had a lot of fun getting to this point. I hope that another company gets involved with POWER64 hardware, I am most particularly interested in this potential PowerPi. However at this point I think I am putting all this work on hiatus.
The existing code for the port can be found here if anyone is curious.
There is a part 2 of this post that continues this adventure.
Misconceptions about the UNIX Philosophy (2024/01/05)
I recently had a discussion with a friend of mine about some talking points that Jonathan Blow made regarding the "UNIX Philosophy" during his interview on Oxide's On The Metal podcast. I'll place an excerpt of the provided transcript here. (slightly edited since there were some errors in the transcript compared to what I heard Jonathan say)
Jonathan
I'm going to throw out another stone that will get people mad at me,
but so in terms of all this complexity that needs to be collapsed,
I think everything has its time. The thing–

Bryan
God, what's next? Where are you going after that?

Jonathan
Well, the Unix philosophy for example it has been inherited by
Windows to some degree even though it's a different operating system,
right? The Unix philosophy of you have all these small programs that you
put together in two like ways, I think is wrong. It's wrong for today and
it was also picked up by plan nine as well and so-

Bryan
It's micro services, micro services are an expression of Unix philosophy,
so the Unix philosophy, I've got a complicated relationship with Unix philosophy. Jess,
I imagine you do too, where it's like, I love it, I love a pipeline, I love it when I want to
do something that is ad hoc, that is not designed to be permanent because it allows me– and you
were getting inside this earlier about Rust for video games and why maybe it's not a fit in terms
of that ability to prototype quickly, Unix philosophy great for ad hoc prototyping.
There is this idea that to be UNIX means you have multiple tiny programs talking to each other over pipes, and some even take it further to implicate that this communication must be plain text. This classification is a deep misunderstanding of the ideas put forward by UNIX, and yet is a position I see many of my peers share. I see this in how when the UNIX philosophy is brought up in context of modern systems, people point to microservices and say "look at that, microservices are UNIX and microservices suck!".
How did this happen?
I feel like this is the case of people confusing the implementation for the design. Missing the forrest for the trees. I believe this happened because of people quoting and repeating things as mantras without context. The one I hear a lot is "Write programs that do one thing and do it well", which is attributed to Peter H. Salus in "A Quarter-Centurary of Unix". I also see quotes quite often from Doug McIlroy written in a Bell System Technical Journal, in particular from a bulleted list that Doug gives under a section titled Style:
A number of maxims have gained currency among the builders and users of the UNIX system to explain and promote
its charachteristic style:

(i) Make each program do one thing well. To do a new job,
build afresh rather than complicate old programs by adding new features.

(ii) Expect the output of every program to become the input to another,
as yet unknown, program. Don't clutter output with extraneous information.
Avoid stringently columnar or binary input formats. Don't insist on interactive input.

(iii) Design and build software, even operating systems, to be tried early, ideally within weeks.
Don't hesitate to throw away the clumsy parts and rebuild them.

(iv) Use tools in preference to unskilled help to lighten a programming task, even if you have to detour
to build the tools and expect to throw some of them out after you've finished using them.
These first two set of quotes seem to be so important that if you go to the Wikiepdia page for "UNIX philosophy" these are the first two quotes given in the "Origin" section. At a surface glance these are not exactly incorrect, I am not calling either author here wrong, you can observe that UNIX as it was implemented follows these ideas. The error here is when people extrapolate these implementation details out as the philosophy itself, when instead these are byproducts of applying the philosophy to specifically Operating Systems. The first two style rules given by Doug implicate specifically programs, a unit of organization that really only an operating system (whose primary job is managing them) would care about. Rule three here starts to get a bit more abstract, specifically because it implicates software and not programs, and is something I too find to be generally good advice outside of operating systems. Continuing to rule 4, we again see Doug refer to tools not processes and as such is something that I also agree with is generally adaptable to software at large.
Yet why aren't the last two style rules repeated more when discussing the "UNIX Philosophy"? Why do people seem to stop at things that tie the philosophy so closely to the notion of Operating Systems? Thinking that microservices are UNIX because it's a bunch of small programs talking to each other doesn't make sense because microservices is an architechture for distributed systems and the notion of these small programs talking to each other is a rule for operating systems. The friction that people face are from shoving a square peg in a round hole.
Actual UNIX Philosophy
Let us dig a bit more to see if we can find something that is a bit more abstract. A good start is in the preface to "The UNIX Programming Environment" by Brian Kernighan and Rob Pike. Of which the following is an excerpt:
Even though the UNIX system introduces a number of innovative programs and techniques, no
single program or idea makes it work well. Instead, what makes it effective is an approach to
programming, a philosophy of using the computer. Although the philosophy can't be written down
in a single sentence, at its heart is the idea that the power of a system comes more from
the relationships among programs than from the programs themselves. Many UNIX programs do quite
trivial tasks in isolation, but, when combined with other programs become general and useful tools.

Our goal in this book is to communicate the UNIX programming philosophy. Because the philosophy is
based on the relationships between programs, we must devote most of the space to discussions about
individual tools, but throughout run the themes of combining the programs and using programs to build
programs. To use the UNIX system and its components well, you must understand not only how to use programs,
but also how they fit into the environment.
So what happens when we abstract out those pesky operating system specific terms like "program" and "process", what we find here is that the UNIX philosophy is about composability. I'd argue the size and purpose of a program matters less so then its ability to be used with others. What feels nice about using an operating system like UNIX is that you can put code together in ways not intended, the pieces fit together like LEGO bricks.
Let us revisit the topic of microservices. The issue I often see (and have experienced) is that information flows between them in a complicated manner. Data flows through UNIX pipes linearly, from one to the next and the entire chain is present in the command, in a distributed system with a microservice design data flow often time looks more like a complicated graph with multiple edges between nodes. We can see clearly that in accordance to Rob and Brian's definition of UNIX design, microservices fail because they compose poorly. Every new edge to a node on the graph brings with it complicated dependency and overhead.
Composability doesn't have to be between programs, if for example you are building a game or end user program, composability may mean that individual libraries or components of the overall program fit together nicely. A single program can be UNIX-like, if the various individual pieces of its internals fit together well.
End
I want to cap this off by using a excerpt from Ken Thompson and Dennis Ritchie's paper "The UNIX Time-Sharing System", specifically a section titled "Perspective".
Three considerations which influenced the design of
UNIX are visible in retrospect.

First, since we are programmers, we naturally designed
the system to make it easy to write, test, and run programs.
The most important expression of our desire for program-
ming convenience was that the system was arranged for
interactive use, even though the original version only sup-
ported one user. We believe that a properly designed inter-
active system is much more productive and satisfying to use
than a “batch” system. Moreover such a system is rather
easily adaptable to noninteractive use, while the converse is
not true.

Second there have always been fairly severe size con-
straints on the system and its software. Given the partiality
antagonistic desires for reasonable efficiency and expres-
sive power, the size constraint has encouraged not only
economy but a certain elegance of design. This may be a
thinly disguised version of the “salvation through suffer-
ing” philosophy, but in our case it worked.

Third, nearly from the start, the system was able to, and
did, maintain itself. This fact is more important than it
might seem. If designers of a system are forced to use that
system, they quickly become aware of its functional and
superficial deficiencies and are strongly motivated to cor-
rect them before it is too late. Since all source programs
were always available and easily modified on-line, we were
willing to revise and rewrite the system and its software
when new ideas were invented, discovered, or suggested by
others.
Using 9front as a home router (2024/01/04)
When people discuss Plan 9 it is usually mentioned that Plan 9 is a real file orientated design but I think its is sometimes hard to conceptulize the benefits of this from an outside perspective. To assist with this I wanted to discuss how I have my 9front box at home configured to act as my home router, and show how it's done.
My hardware setup is an old DELL OEM that I've jammed a 4 port ethernet pcie card in to. I use this for both the LAN and uplink since the on board ethernet port is not gigabit. Nothing fancy, just some hardware I had lying around.
Preface
Before we get in to the weeds here we're going to need to know our tools. In Plan 9 the kernel exposes a number of functionality through kernel filesystems, think stuff like Linux's /sys/. However unlike Linux Plan 9 exposes multiple roots for different subsections that the user may bind(1) in to their namespace at will. These kernel devices can be access by accessing a path that starts with '#' and is followed be a single rune identifier. For example the IP stack is accessed via '#I' and disks (/dev/sd*) are exposed via '#S'.
Much like 9p filesystems a "mount argument" may also be supplied when accessing these devices, this is usually used to acces a specific instance of a device. For example '#l0' refers to ethernet card 0, '#l1' refers to ethernet card 1 and so on. The ip device ('#I') also allows for a integer argument to specify which IP stack you would like to access, which can be used to setup multiple disjoint IP stacks.
Setup
For making this router happen we'll create a /cfg/$sysname/cpurc script, which will run at startup.
# Place IP stack 1 on /net.alt, this will be our "outside" IP stack
bind '#I1' /net.alt

# Place ethernet card 0 within that outside IP stack
# This is just organizational, not binding it to the IP stack yet
bind -a '#l0' /net.alt

# Create a ethernet bridge and add it to our "inside" IP stack
bind -a '#B' /net
# Add all of our internal ports to our "inside" IP stack
bind -a '#l2' /net
bind -a '#l3' /net
bind -a '#l4' /net
# Bind the interfaces to the bridge
echo 'bind ether port1 0 /net/ether2' >/net/bridge0/ctl
echo 'bind ether port2 0 /net/ether3' >/net/bridge0/ctl
echo 'bind ether port3 0 /net/ether4' >/net/bridge0/ctl

x=/net.alt
o=/net
# Create a virtual IP interface for both the outside and inside IP stack
# We open the clone file, and the kernel will then give us the
# id of the new created interface.
<$x/ipifc/clone {
	# Read the new interface number
	xi=$x/ipifc/`{read}

	# Write in to the ctl file of the newly created interface to configure it
	>$xi/ctl {
		# This is a packet interface
		echo bind pkt

		# Our ip is 192.168.69.3/24 and we only allow remote connections from 192.168.69.2
		echo add 192.168.69.3 255.255.255.255 192.168.69.2

		# Route packets to others
		echo iprouting 1

		# Now create a new interface on the inside IP stack
		<$o/ipifc/clone {
			oi=$o/ipifc/`{read}
			>$oi/ctl {
				# Hook up this device to the outside IP stack device
				echo bind netdev $xi/data

				# Our ip is 192.168.69.2/24 and we only allow remote connections from 192.168.69.3
				echo add 192.168.69.2 255.255.255.0 192.168.69.3
				echo iprouting 1
			}
		}
	}
}

# Configure our route table for both the inside and outside IP stacks
# Arguments are: target mask nexthop interface(addressed by IP)
echo add 192.168.168.0 255.255.255.0 192.168.69.2 192.168.69.3 > $x/iproute
echo add 0.0.0.0 /96 192.168.69.3 192.168.69.2 > $o/iproute

# Do DHCP on the external interface. -x tells us which
# IP stack to use. -t tells us that we are doing NAT
# and to configure the route table as such. NAT is implemented
# as just a route table flag.
ip/ipconfig -x /net.alt -t ether /net.alt/ether0

# Configure a static IP on our internal interface, which will
# act as a gateway for our internal network.
ip/ipconfig ether /net/ether2 192.168.168.209 255.255.255.0

# Start dhcpd on our internal network, our DHCP range is 192.168.168.50-192.168.168.150
/bin/ip/dhcpd 192.168.168.50 100
It is worth noting that ip/ipconfig is mostly a convenience and has no magic under the hood, it itself is just talking to files in /net. This allows us to pass different /net's via -x as we like.
That's all folks. I've been using this for about a year now and haven't had any problems with it.
Further Reading
You can read more about the specific kernel devices within section 3 of the 9front manual. Some of the ones we used today: ether bridge ip.
9front also has a network database (NDB) that is used to infer systems and their ip addresses (among other things) but was omitted to keep a focus here if you want to read more about it, look at ndb(6) and the wiki
Running 9front on an emulated SGI Indy via MAME (2024/01/01)
I recently found that MAME supports running the SGI Indy while looking for ways to test some modifications I was making to the mips code in 9front. After a fair bit of elbow grease cinap and I (but mostly cinap) were able to get the old 9front indy kernel booting and running within mame. I thought I might as well document how we set things up here. As a word of warning this will require some decent 9front infrastructure setup already and some familiarity with things like ndb, additionally this system is barely usable from a modern standard so its usefulness is limited.
Baseline MAME Indy
The mainline MAME only gives the Indy 16MB of ram, which is a little tight. Thanks to some clever folks on the irixnet forums I found a patch for bumping this limit to the theoretical maximum (256MB), you can grab a prepatched repo here or if you are using a system with nix flakes available you can use nix run github:majiru/9front-in-a-box#mame.
Next you'll need to grab the required firmware files, of which I used this guide to get going, some links may be dead but some google searching of the required file names should get you some archive.org files.
Next you'll need to configure networking, MAME is a bit unique here and expects a tap named tap-mess-$UID-0, additionally after running once you'll need to modify the $MAMEROOT/cfg/indy_4610.cfg to make the edlc device line like so:
<device tag=":edlc" interface="0" mac="08:00:69:12:34:56" />
Then you'll also likely need to modify the network from the in-emulation menu in MAME, which can be found by booting up the emulator, hitting ScrlLk followed by Tab, then clicking network settings and arrowing over to TAP/TUN network. This should only need to be done once as it will change the interface= line for the edlc device, unfortunately this specific index seems to be OS specific (was 0 for me on linux, was 2 for cinap on Windows) so its a bit difficult to modify without the in-emulation menu. At this point you should have a working Indy with networking, I suggest perhaps booting in to IRIX (as documented in the neocities guide) and double checking if you get stuck further on.
(editor's note: a real tap-mess indeed)
9front bits
Now for the fun bits, lets setup our 9front grid for bootp'ing this device. Let's first build the userspace and kernel:
cd /sys/src/
objtype=mips mk install
cd /sys/src/9/sgi
mk install
Next we need to configure the network booting, first add a /lib/ndb/local line to the tune of:
ip=192.168.168.214 ether=080069123456 sys=indy dom=indy.genso fs=myfs auth=myauth bootf=/mips/9indy
Then assuming you have your ip/tftpd running and MAME setup correctly you can boot up the Indy, click the button for maintenance mode, enter the PROM shell, then type BOOTP(); which should grab your kernel and boot right up.
Profit?
NixOS + 9Front (2023/07/21)
I, along with seemingly others, have recently discovered the NixOS linux distribution and have been having a lot of fun with it. A lot of discussion I see on NixOS tries to answer more pragmatic questions about its use. Topics such as it's feasibility as a daily driver and the learning curve of the nix language itself. While these topics are definitely worth talking about, I feel like they don't address what I consider to be the reasons for why I've been enjoying my time with it.
Its all one hackable monorepo
NixOS is entirely contained in the one NixOS/nixpkgs github repo. This design choice has made the world of difference in both how I think about using my linux system and how I am able to become an active participant.
The git repo part has some real nice aspects to it, some quick ones include:
- easy to fork and maintain your own personal branch
- whole system moves as one continuous history
- you can git bisect your system upgrades!
- you only have one place to grep
To add a bit of narrative to that, using NixOS has been the first time where I felt like knew where to look for figuring out how the sasuage was made. I can learn and study the system, both for figuring out perhaps why something acts the way that it does or just to read to see how things click together. The fork-ability adds a lot to this as well, you are not "sitting on top of" the bespoke system setup. If you want something done differently on your system you have all the tools and access to do it in the same structured way as the OS maintainers themselves use. Having come over from arch, where each pacman -Syu was a hail mary of broken mesa or weird xwayland bugs, this has felt quite refreshing.
I find these benefits to be common for any sort of OS project that prefers to keep everything in one monorepo. With 9Front being perhaps the example I am most fond off, and an honorable mention to the BSDs in this regard. I could award full points if parts of ports didn't feel like it was about to atrophy.
Talk's cheap
It sure is. To "walk the walk" on my feelings about this, and for some of my own fun I began to slowly port over utilities that I, along with others in the 9front space, have built for use on linux. The goal being to see how nicely I could integrate my NixOS install in to my existing 9Front system.
I started first with drawterm, the "9front rdp" so to say. Nixpkgs had it already but there were a couple issues, the audio didn't work and there was no package for building the wayland graphical backend variant. Read some docs, learned some nix, and got that taken care of. Once it had been merged I had a desire to use it within my existing setup but didn't quite want to switch over to the unstable channel. Instead I just cherry-pick'd the commit over my own copy of the nixos-23.05 release branch. With flakes this was as easy as just changing the nixpkgs input to point to my own github repo. (Its worth noting that there is a process for backporting to the release branch officially).
With that done I moved on to adding my own new package, tlsclient. Tlsclient has become a bit of a swiss army knife for 9front related authentication tools on linux and as such includes a PAM module for authenticating against a 9front authentication server. Now this is something that I never really had packaged in the past, having some script to automatically modify and otherwise mess with peoples pam.d/ never felt right to me. However with the entirety of the pam config being generated as part of nixpkgs, it was quite easy to just add in the NixOS module configuration options and the corresponding PAM configuration generation based on those. The result is quite nice to use I think, here is the related excerpt from my configuration.nix:
security.pam.dp9ik = {
    enable = true;
    authserver = "flan";
};
I continued then with writing and integrating a new utility from tlsclient, a "mount helper", that wraps the linux kernel's native 9p filesystem in a dp9ik authenticated tls tunnel. After packaging this up I was able to add the following to my configuration.nix as well:
system.fsPackages = [ pkgs._9ptls ];
fileSystems."/n/flan" = {
    device = "flan";
    fsType = "9ptls";
    options = [
      "auth=flan"
      "port=9090"
      "user=moody"
      "uid=moody"
      "nofail"
    ];
};
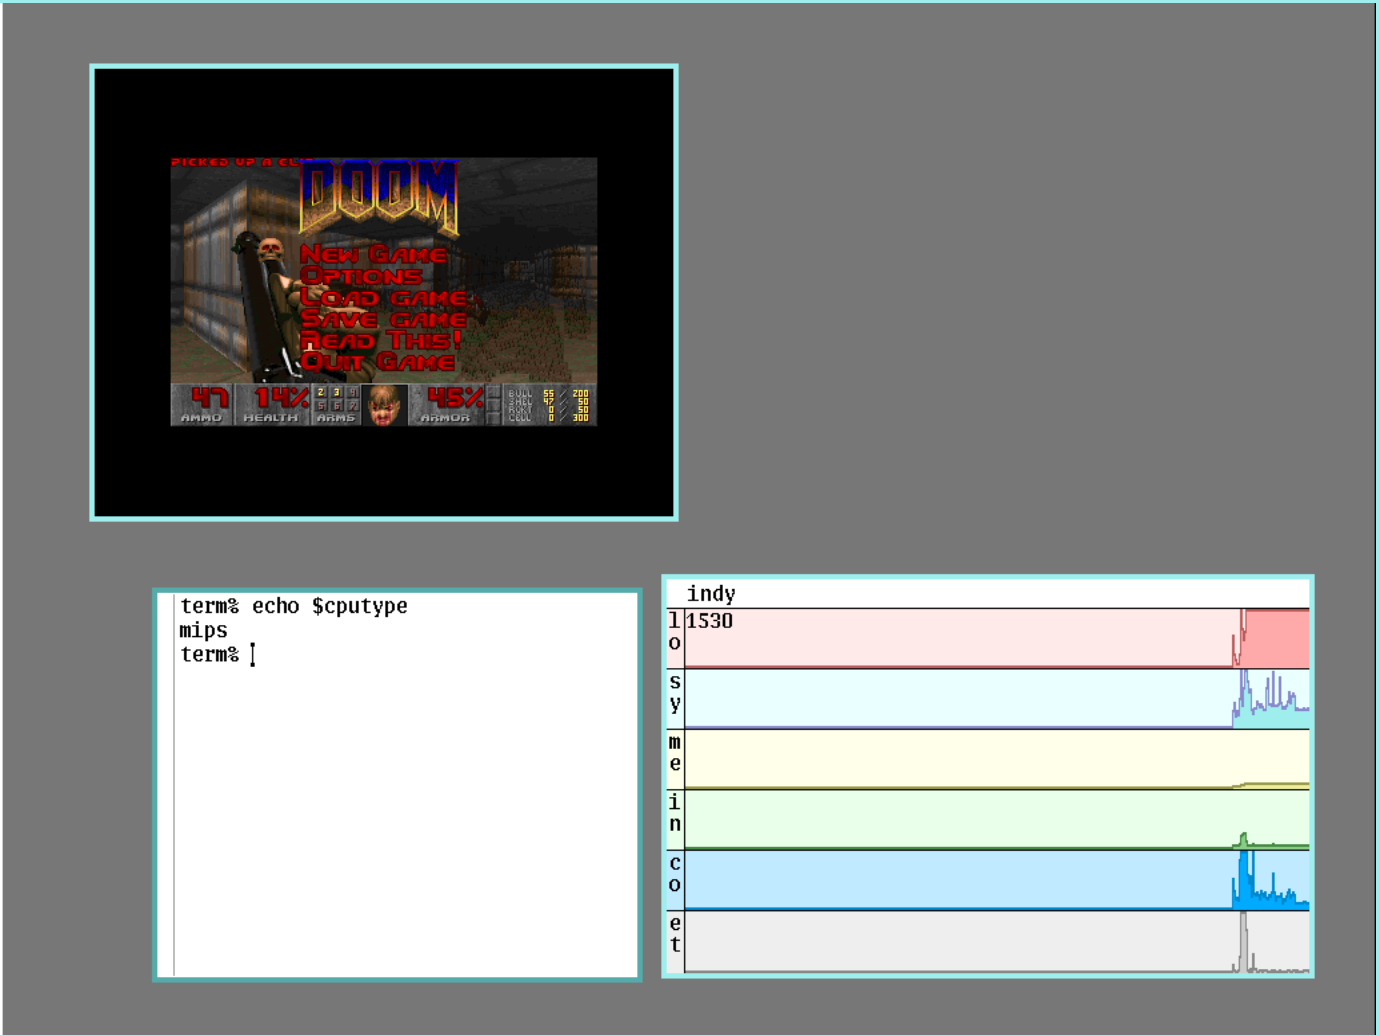
And just like that I had my NixOS box mounting and authenticating like a 9front machine, all without too much fuss. The only logical next step was to make it look like a 9front machines as well, to which I think I did a pretty convincing job:

Wrap up
I had some good fun, was able to port over my existing linux tools without much fuss, and even got them upstreamed for once. I will likely continue to use NixOS in to the near future as my linux of choice.
If you want to look at my nix stuff you can find my personal nixpkgs development branch here, and my configurations and overlays here.